

If you want musty odors gone after water cleanup, your first job is fast, controlled drying. Moisture drives microbial growth and VOCs within 24–72 hours, so you’ll verify hidden wet spots, move air correctly, and size dehumidifiers to the load. You’ll protect materials and health by measuring, not guessing, with meters and safe heat. Skip perfumes; fix the moisture. Next, you’ll map the space, set airflow paths, and decide what to dry—and what to remove.
The Science Behind Musty Odors After Water Intrusion

When porous materials stay damp for 24–48 hours, spores from common molds like Aspergillus and Penicillium germinate and metabolize, releasing volatile organic compounds (MVOCs) that your nose detects as a musty odor.
You’re smelling byproducts of microbial metabolism—small, airborne odor compounds such as alcohols, ketones, and terpenes. They partition from wet substrates into indoor air and sorb onto nearby surfaces and fibers. As you serve occupants, prioritize source control: identify affected materials, limit disturbance, and use PPE to prevent inhalation exposure. Ventilate to dilute MVOCs before handling contents. Document locations, materials, and odor intensity to guide removal decisions. Confirm progress with objective odor checks, surface moisture readings, and air changes achieved.
How Moisture Fuels Microbial Growth and Odor Formation
Although materials can look dry on the surface, excess moisture in pores and fibers drives microbial metabolism that creates musty odors. You’re feeding the microbial lifecycle: water enables spore germination, enzyme activity, and biofilm development. As microbes digest cellulose, skin oils, and dust, they release VOCs—primary odor sources you can smell. Control comes from lowering water activity, not just appearance. Verify with moisture meters, not touch. Remove water, reduce humidity, and maintain airflow to disrupt metabolism. Isolate impacted zones, wear PPE, and prevent aerosolization during handling. Clean residues to strip nutrients, then dry to specification so microbes can’t restart.
Critical Timelines: What Happens in the First 24–72 Hours

Act fast in the first 24–72 hours because conditions shift from salvageable to high-risk quickly. Your moisture timeline sets the outcome: within hours, porous materials wick water, finishes delaminate, and odors intensify. By 24 hours, the microbial timeframe begins; by 48–72, colonies mature, VOCs spike, and structural fibers weaken. Work deliberately to protect occupants and contents.
- Stop intrusions, isolate wet zones, and power down unsafe circuits.
- Extract standing water; remove saturated pads and debris.
- Create directed airflow and dehumidification; control temperature.
- Clean and apply EPA-registered disinfectants to affected surfaces.
- Document conditions and decisions to guide ethical, service-centered actions.
Assessing Hidden Moisture With Meters and Thermal Imaging
Speed buys you time, but only measurement tells you where moisture still hides. Begin with a thermal assessment to map temperature anomalies; cooler zones can indicate evaporation. Confirm with moisture detection tools: use a non-invasive meter to scan surfaces, then a pin meter to verify subsurface readings. Record baseline humidity, temperature, and material moisture content. Compare findings to unaffected areas. Prioritize safety—de-energize circuits before probing near outlets, wear PPE, and avoid contaminated zones. Pull baseboards, check sill plates, and inspect behind vapor barriers where wicking occurs. Document readings, mark boundaries, and set recheck intervals to guarantee progressive drying and odor prevention.
Airflow Strategies: Placing Fans for Efficient Evaporation
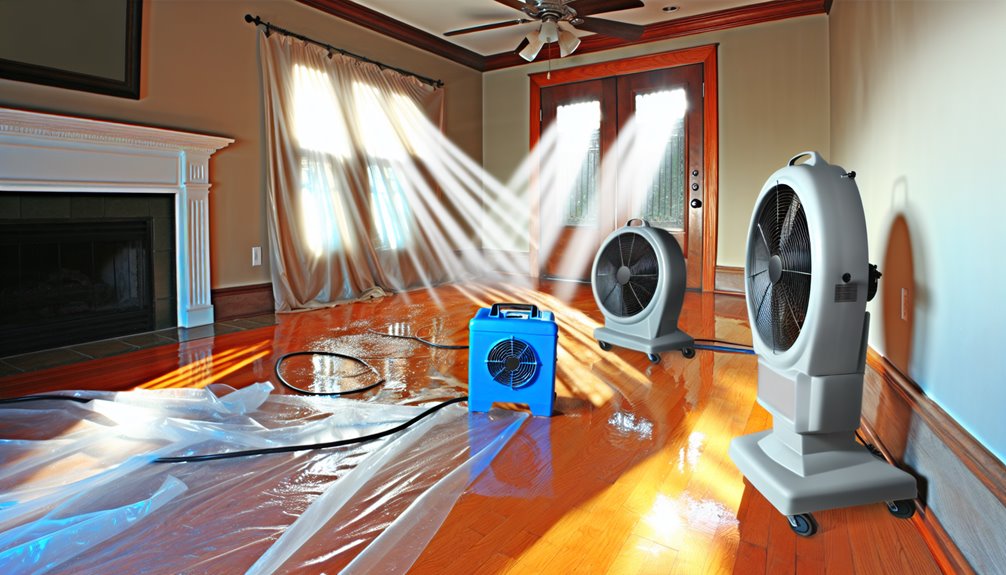
Because evaporation depends on vapor pressure and air movement, place air movers to sweep saturated surfaces without creating dead zones or aerosolizing contaminants. Set fan positioning to form a continuous path that pushes moisture-laden air toward exhaust points. Align airflow direction parallel to wet surfaces, 2–4 inches above, to shear boundary layers without dislodging debris. Angle units so streams overlap slightly, preventing stagnation in corners and behind furnishings. Isolate contaminated zones with barriers and PPE.
- Map wet zones; mark obstacles.
- Start at the dry perimeter, work inward.
- Bridge stairwells and hallways with opposing streams.
- Lift baseboards; flush wall cavities.
- Log placements; verify with anemometer.
Dehumidification: Choosing and Sizing the Right Equipment
How do you translate square footage and saturation into the right mix of dehumidifiers without wasting power or spreading contaminants? Start by measuring affected cubic footage and target a daily moisture removal rate that achieves 40–50% RH within 24–48 hours. Match dehumidifier types to conditions: LGR/refrigerant units for warm, humid rooms; desiccants for cool or deeply saturated assemblies. Calculate pints per day from load, add 20–30% capacity for absorption in contents and hidden voids. Isolate zones, seal bypass paths, and use manometers to verify negative or neutral pressure. Place units upwind of wettest areas. Track grains-per-pound drop hourly; adjust quantity, not runtime.
Heat and Ventilation: When and How to Add Controlled Warmth

When moisture lingers despite dehumidification, add controlled heat and directed ventilation to accelerate evaporation without driving contaminants or causing damage. You’ll use portable heat sources and air movers to raise surface temperatures and shear boundary layers, while maintaining controlled humidity via dehumidifiers. Target 80–95°F air near wet assemblies; verify with thermohygrometers, infrared, and anemometers. Avoid negative pressure that could backdraft combustion appliances. Prioritize occupant safety, electrical load limits, and cord routing.
- Preheat intake air, not materials.
- Create airflow paths from warm to exhaust.
- Pulse heat; monitor RH below 50%.
- Balance CFM with grain depression.
- Log readings; adjust every 2–4 hours.
Material-Specific Drying: Drywall, Carpets, Wood, and Contents
Materials dictate your drying plan, so match techniques to substrates to prevent odor set, warping, and microbial growth. For drywall considerations, stop wicking: remove baseboards, probe with a moisture meter, create weep holes or cut a flood line, and drive low-grain dehumidification with crossflow air. For carpet treatments, extract aggressively, lift for airflow, replace wet pad if contaminated, and sanitize backing safe for fibers. For wood floors, map moisture, deploy panel drying mats, control grains-per-pound to prevent cupping, and gradually step down temperature. For contents, triage: hard goods towel-dry and ventilate; porous items freeze-dry or discard. Always isolate hazards and use PPE.
Verification and Odor Control: Monitoring, Cleaning, and Post-Dry Steps
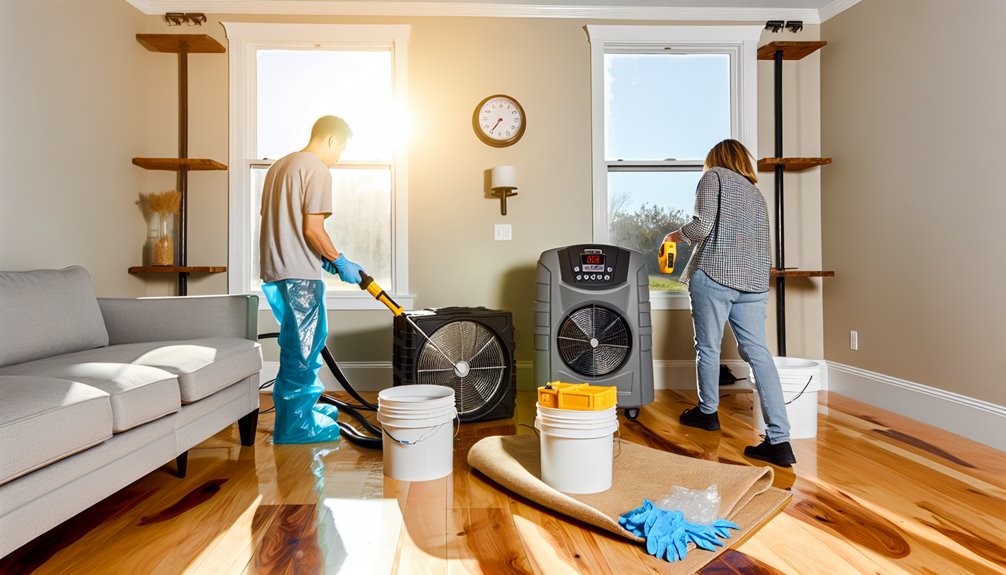
With substrates stabilized, you verify dryness and neutralize odors before rebuilding. Use verification methods—penetrating meters, IR thermography, and psychrometrics—to confirm equilibrium moisture content. Document readings, isolate anomalies, and extend drying if needed. Then address odor detection with calibrated instruments and trained noses. Clean all surfaces: HEPA vacuum, wet-wipe with EPA-registered disinfectant, and rinse. Apply odor counteractants matched to source, then perform post-dry clearance.
- Calibrate meters; record ambient and material baselines.
- Open assemblies only when readings trend stable.
- Wear PPE; control aerosols and cross-contamination.
- HEPA-scrub air; replace carbon after saturation.
- Conduct client walk-through; confirm zero-detectable odor.
Conclusion
I understand that dealing with water damage can be overwhelming, but at Hydra Clean, we’re here to help make the process smooth and effective for you. Our team is dedicated to ensuring your space is thoroughly dried and free of musty odors, so you can get back to enjoying your home or business. If you have any questions or want to learn more about our services, I invite you to visit us at myhydraclean.com or give us a call at (601) 336-2411. Let’s work together to restore your space to its best condition!