

If you want musty odors gone after water cleanup, the first job is fast, controlled drying — not stronger air fresheners. Moisture drives microbial growth and the volatile compounds that produce that unmistakable musty smell, and the timeline is shorter than most people realize. Within 24-72 hours of water exposure, mold and bacteria establish themselves and start producing the odor compounds you’re trying to eliminate. Skip the perfumes; fix the moisture. Here’s how to actually remove musty odors after water damage instead of just covering them up.
The Science Behind Musty Odors After Water Intrusion

The musty smell that follows water damage isn’t random — it’s the byproduct of specific biological processes. When porous materials stay damp for 24-48 hours, mold spores from common species (Aspergillus, Penicillium) germinate and start metabolizing. As they do, they release microbial volatile organic compounds (MVOCs) — small airborne molecules including alcohols, ketones, and terpenes that your nose recognizes as “that musty smell.”
Once those compounds are in the air, they don’t stay there. They sorb onto nearby fabrics, walls, and furnishings, which is why cleaning up the wet area doesn’t always remove the smell. Real odor control means addressing both the source (the wet materials growing mold) and the secondary contamination (the surfaces that absorbed the airborne compounds). Document affected materials and odor intensity so you can verify progress as the drying continues.
How Moisture Fuels Microbial Growth and Odor Formation
Materials can look dry on the surface while staying wet enough underneath to fuel ongoing microbial growth. Excess moisture in pores, fibers, and substrate cavities is what microbes need to thrive. Water enables spore germination, enzyme activity, and the development of biofilms that produce ongoing odor for weeks if you don’t intervene.
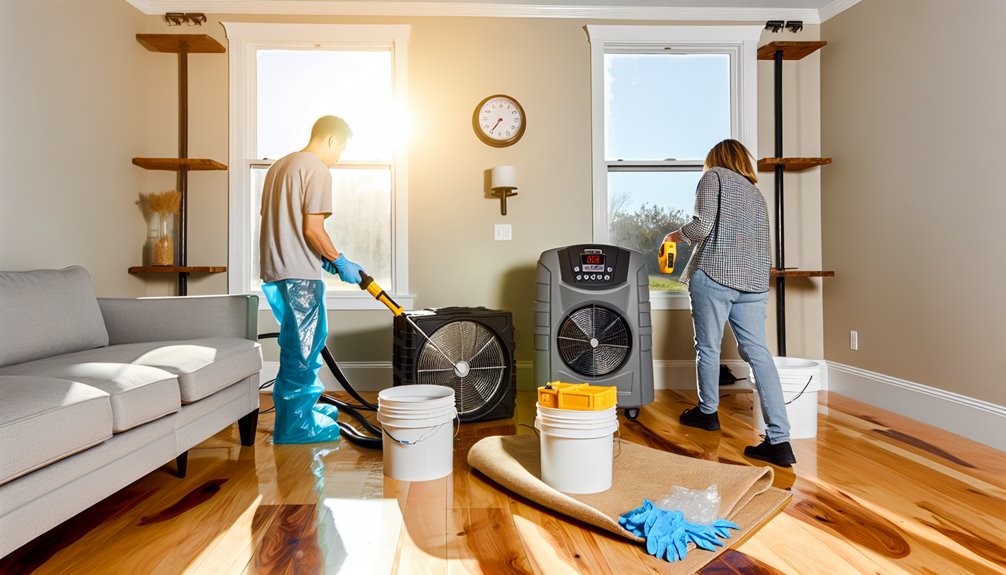
The fix is reducing water activity below the threshold microbes need to function — not just making the surface look dry. Verify with moisture meters rather than touch (which is unreliable). Remove standing water, run dehumidification, and maintain steady airflow to prevent stagnant zones where moisture can persist. Isolate impacted areas and use PPE to avoid breathing the spores you’re trying to eliminate. Clean surface residues to strip the food source microbes need, then dry to specification so growth can’t restart.
Critical Timelines: What Happens in the First 24-72 Hours

The first 72 hours after water damage decide what gets saved and what doesn’t. Within hours, porous materials wick water deep into structures, finishes start delaminating, and odor compounds begin building up. By 24 hours, the microbial timeline kicks in. By 48-72 hours, colonies mature, MVOC release accelerates, and structural materials weaken.
- Stop the source of intrusion, isolate wet zones, and power down any unsafe electrical circuits.
- Extract standing water and remove saturated padding or debris.
- Set up directed airflow with fans and dehumidification at the right capacity for the space.
- Clean surfaces and apply EPA-registered disinfectants to affected areas.
- Document conditions and decisions for insurance and future reference.
For the broader water damage response timeline, water damage restoration steps from extraction to drying walks through the full sequence.
Assessing Hidden Moisture With Meters and Thermal Imaging
Speed gives you time, but only measurement tells you where moisture is still hiding. Start with thermal imaging to map temperature anomalies — cooler areas often indicate active evaporation from wet materials. Confirm thermal findings with moisture meters: a non-invasive surface meter for the initial scan, then a pin-style meter to verify subsurface readings on materials of concern.
Record baseline humidity, temperature, and moisture content for both affected and unaffected areas so you can track progress against a stable reference. Pull baseboards to check the wall cavity. Inspect sill plates and behind vapor barriers where wicking commonly occurs. De-energize any nearby electrical before probing. Mark the boundaries of wet zones, set recheck intervals, and document everything — the documentation matters for insurance and for verifying when drying is actually complete.
Airflow Strategies: Placing Fans for Efficient Evaporation
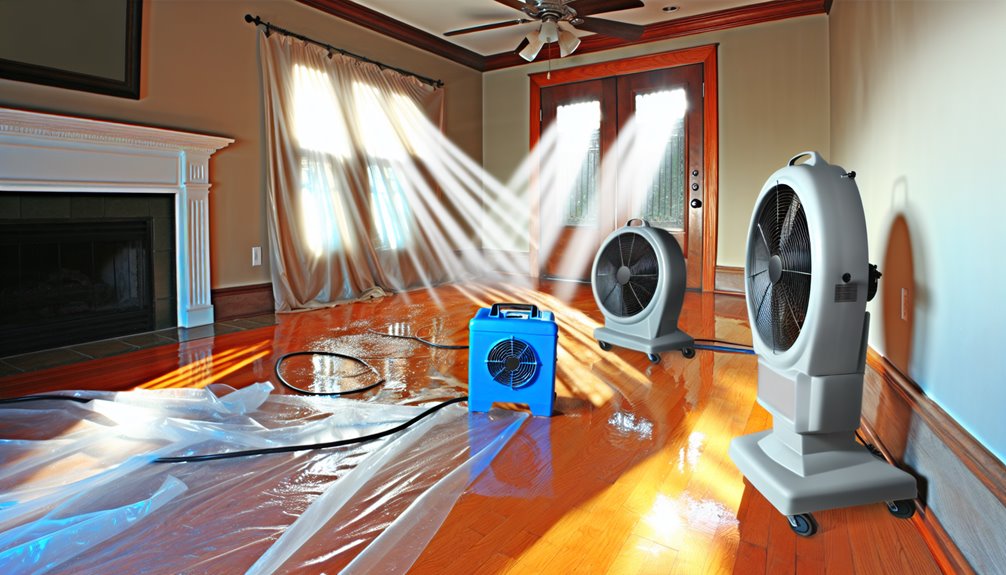
Evaporation depends on both vapor pressure and air movement. Air movers need to sweep saturated surfaces without creating dead zones (where moisture lingers) or dispersing contaminants into clean air. The basic principle: align airflow parallel to the wet surface, 2-4 inches above, so the air shears the boundary layer of moisture-saturated air without dislodging dust or debris.
- Map the wet zones and any obstacles that affect airflow patterns.
- Start fans at the dry perimeter and work inward, pushing moisture toward exhaust points.
- Bridge stairwells and hallways with opposing air streams so circulation continues throughout the space.
- Lift baseboards to flush wall cavities where moisture often hides.
- Log fan placements and verify with an anemometer that air is actually moving where you expect.
Dehumidification: Choosing and Sizing the Right Equipment
Dehumidification turns the airflow into actual moisture removal. The right approach depends on the space and the saturation level. Measure the cubic footage of affected area and target a daily moisture removal rate that brings relative humidity to 40-50% within 24-48 hours.
Match the equipment type to conditions. LGR (low-grain refrigerant) units work well in warm humid spaces. Desiccant dehumidifiers handle cool or deeply saturated assemblies better. Calculate pints-per-day capacity based on the moisture load, then add 20-30% to account for absorption in contents and hidden voids. Isolate zones, seal bypass paths so dehumidified air doesn’t escape, and place units upwind of the wettest areas. Track grains-per-pound drop hourly during the work and adjust unit count rather than just runtime.
Heat and Ventilation: When and How to Add Controlled Warmth

When moisture lingers despite proper dehumidification, controlled heat accelerates evaporation. Use portable heaters and air movers together to raise surface temperatures and shear the boundary layer of damp air, while dehumidifiers maintain controlled humidity in the space.
Target 80-95°F near wet assemblies, verified with thermohygrometers and infrared thermometers. Avoid creating negative pressure that could backdraft combustion appliances elsewhere in the building. Mind electrical load limits and route cords safely.
- Preheat intake air rather than heating materials directly.
- Create directional airflow paths from warm zones to exhaust points.
- Pulse heat in cycles; maintain RH below 50% throughout.
- Balance airflow (CFM) with grain depression for efficient drying.
- Log readings every 2-4 hours and adjust as needed.
Material-Specific Drying: Drywall, Carpets, Wood, and Contents
Different materials need different drying approaches. Drywall: stop wicking by removing baseboards, probing with a moisture meter, and creating weep holes or a flood-cut line if needed. Drive aggressive low-grain dehumidification with crossflow air to dry from both sides.
For carpets: extract moisture aggressively, lift the carpet for airflow underneath, replace wet pad if it’s contaminated (Category 2 or 3 water), and sanitize the backing with fiber-safe products. Fast water extraction to save carpets and prevent mold covers the carpet-specific approach in detail.
For wood floors: map moisture before any drying decisions, deploy panel drying mats, control grains-per-pound to prevent cupping or warping, and step temperature down gradually. For contents: triage hard items for towel-drying and ventilation; porous items either freeze-dry professionally or get discarded if contaminated. Always isolate hazards and use PPE.
Verification and Odor Control: Monitoring, Cleaning, and Post-Dry Steps
Drying isn’t done when surfaces look dry — it’s done when measurements confirm dry. Use penetrating moisture meters, IR thermography, and psychrometric readings to verify equilibrium moisture content matches unaffected reference areas. Document every reading. If anomalies remain, extend drying rather than declaring victory early.
Once dryness is confirmed, address the residual odor. Calibrated instruments and trained noses both help here. HEPA-vacuum all surfaces, wet-wipe with EPA-registered disinfectant, and rinse properly. Apply odor counteractants matched to the specific source (the right enzyme treatment for biological odors, oxidizing treatments for stubborn molecules). Conduct a final walk-through with the property owner to verify zero detectable odor before closing the project.
- Calibrate all meters and record ambient and material baselines.
- Open building assemblies only when readings trend stable.
- Wear PPE and control aerosols during all phases.
- HEPA-scrub the air and replace activated carbon filters once they’ve absorbed their capacity.
- Confirm zero detectable odor at the post-restoration walk-through.
Conclusion
Removing musty odors after water cleanup isn’t about masking the smell — it’s about systematically removing the moisture that produces it. Fast response, accurate moisture mapping, the right airflow and dehumidification, material-specific drying, and verification before declaring victory all combine to actually eliminate the source.
For water damage that’s already produced persistent odor, professional service handles the verification and treatment work that’s hard to do well as a DIY project. Visit our water damage restoration service page to learn more, or call (601) 336-2411 for a free assessment.